Blog
- Home
- /
- Blog
10 Best Textile Photos for Global Buyers
Choosing a textile supplier often begins with a visual question: does the material look right for the intended product? Well-made textile photos help global buyers assess texture, color, weave, and finish before requesting samples. But a screen cannot reveal everything. Lighting can soften a rough surface, and a close crop may hide the fabric’s scale. Useful images make those limits easier to recognize rather than pretending they do not exist.
This guide highlights 10 textile photos that support clearer sourcing conversations. It covers close-ups of yarn and weave, full-width fabric views, drape and movement, color options, surface finishes, and details such as selvages or stitching. Production and packaging images can add context, while a simple reference beside the fabric helps buyers judge scale. Small details matter. Consistent lighting and honest color representation make comparisons more reliable, though screens may still display shades differently. Buyers should confirm important specifications with written details and, when possible, a physical swatch. One image is rarely enough. The strongest textile photos answer practical questions, show the material clearly, and leave room for verification. Some examples may be less polished than a studio image, and that is worth considering: real sourcing decisions depend on evidence, not appearance alone.
What Makes a Textile Photo Useful to Global Buyers
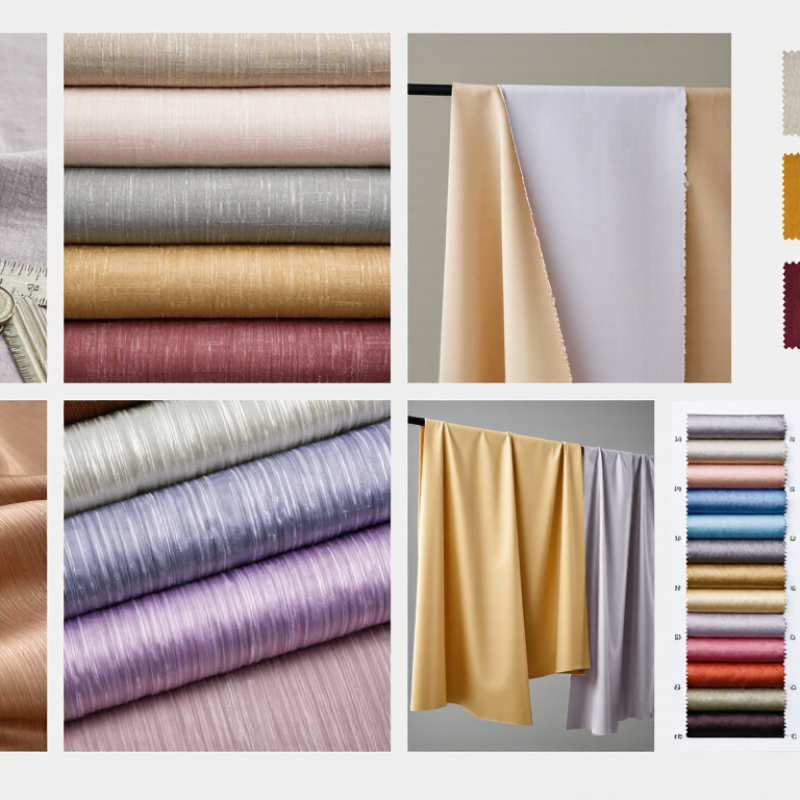
A useful textile photo answers questions that a swatch cannot: How open is the weave? Does the surface catch light? Are the colors consistent across the roll? Baymard Institute’s product-page usability research found that 56% of test participants began by exploring product images. The study concerns online product pages broadly, not textiles alone, but its lesson travels well: buyers inspect before they read. Show a full-width fabric view, then a close-up with visible threads and a familiar scale reference. Include the reverse side when finish or backing matters.
Lighting can quietly mislead. A warm studio lamp may turn cool grey into beige, while a hard flash can flatten a brushed surface. Use even, neutral lighting, and keep color settings consistent across the image set. Add a color reference or measured color values when shade matching is critical; a screen image is not a physical approval standard. AATCC’s color-measurement methods highlight the importance of controlled conditions when assessing textile color. Still, a perfectly controlled image cannot show every hand-feel detail. That limitation deserves a clear note.
Tips: Photograph the fabric flat and draped, with one close-up for texture. Keep the camera square to the surface, include the width, and label fiber content, finish, and available shade range. Avoid heavy filters. One honest wrinkle may help more than a polished image that hides the fabric’s behavior.
10 Best Textile Photos for Global Buyers
What makes a textile photo useful to global buyers? The chart ranks ten photo types with an editorial usefulness score from 1 to 5. These are rubric-based ratings, not survey results.
Clear views of the fabric, its weave, and its true color help buyers assess a textile remotely. Drape, finishing, scale, pattern repeat, labeling, and packaging provide additional product context.
Ten Essential Textile Photo Types for Product Evaluation
A useful textile photo set answers specific questions, not just makes fabric look attractive. Begin with a full-width view to show the overall pattern and scale. Add a close-up of the weave or knit structure, with fibers in sharp focus. Photograph the reverse side, since backing, floats, and loose threads may differ noticeably. Include the selvage or cut edge to reveal finishing and construction. Small details matter.
Photograph color in neutral daylight beside a simple gray reference card. Include a drape shot over a chair edge or mannequin to show how the material falls. A stretch-and-recovery image can show how far a knit extends, though still photos cannot measure performance precisely. Place a thickness view beside a ruler for scale. Use angled light to reveal sheen, nap, or surface texture. Colors can mislead.
Show one sewn panel or finished edge so buyers can assess how the textile behaves in a real application. Keep the background plain, and use consistent lighting across color options. Avoid filters; they can quietly shift both hue and contrast. A photo set can still miss softness, odor, and subtle weight differences. That is an uncomfortable limitation, but an honest one. A physical swatch remains important when those qualities affect the decision.
How Fiber, Weave, Texture, and Color Appear in Images
Fiber, weave, texture, and color each need a different kind of evidence in a textile photo. Textile Exchange’s Materials Market Report 2024 estimates global fiber production reached 124 million tonnes in 2023. That scale makes clear why fiber details matter, but a photograph cannot verify fiber content. Show the material label separately, then photograph the cloth in soft, even light. A close-up can lie. Fine fibers may look glossy, while shadows can make a smooth weave appear coarse. I still find it easy to overread a single image.
For weave, use a sharp detail shot that shows the crossing threads, plus a wider view for pattern and drape. Texture needs side lighting: a low angle reveals raised loops, slubs, or brushed surfaces without hiding the overall hand. Color is less simple. Use a neutral background, avoid mixed lighting, and include a physical color reference when accuracy matters. Screens and editing can shift a shade; buyers should compare images with a swatch before approving a match. That extra check is not glamorous, but it prevents a confident-looking photo from promising more than it can prove.
Visual Details That Help Buyers Assess Quality and Use
A useful textile photo does more than show a pleasing color. It helps buyers judge structure, finish, and likely use. A tight, evenly lit close-up can reveal whether yarns look smooth, slubby, or irregular. Include a wider view, too. It shows the pattern repeat and how the fabric falls in soft folds. A hand or ruler beside the cloth gives scale, though it should not cover key details. Show the reverse side, selvedge, and cut edge when possible. These areas may reveal backing, loose threads, or finishing quality. Still, images cannot confirm hand feel or performance. They can suggest, not prove.
Tips: Photograph the fabric in neutral daylight, with one close-up and one full-width view. Keep white balance consistent. Add a clear scale reference, and label weave, fiber content, or finish only when verified. Avoid heavy filters; they can make muted beige look cream. Small differences matter.
For upholstery or bags, show a stitched sample under gentle tension. For apparel, include a draped panel and seam finish. A clear image of a hem, edge, or crease helps buyers picture construction and handling. Cropping can hide flaws, but honest framing builds confidence. One image may still miss a snag or shade variation. If a batch differs, photograph more than one section and note the variation plainly. Buyers need useful evidence, not a perfect-looking surface.
10 Best Textile Photos for Global Buyers - Visual Details That Help Buyers Assess Quality and Use
| Photo Type | What the Photo Should Show | Visual Details Buyers Can Assess | Potential Use | What to Confirm Separately |
|---|---|---|---|---|
| 1. Full Fabric Width | A straight-on view of the fabric spread flat, with both selvages and the usable width visible. | Visible width, edge finish, pattern alignment, and any obvious distortion across the fabric. | Apparel, home textiles, upholstery, and other cut-and-sew products. | Actual usable width, width tolerance, roll length, and whether the image shows one continuous piece. |
| 2. Close-Up of the Surface | A sharply focused, evenly lit close-up that shows the fabric texture without filters or digital enhancement. | Yarn visibility, weave or knit structure, surface regularity, fuzz, slubs, and obvious defects. | Comparing surface character for clothing, bedding, curtains, and craft applications. | Fiber composition, fabric weight, construction, and finish; a photo cannot establish these specifications by itself. |
| 3. Reverse Side | The back of the fabric, photographed beside or clearly identified against the face side. | Backside appearance, floats, backing, loose yarns, coating, and differences between the two surfaces. | Reversible garments, linings, upholstery, and fabrics where both sides may be visible. | Whether the fabric is intended to be reversible and whether any coating or backing is included. |
| 4. Selvage and Edge Finish | A close view of the lengthwise edge, including the selvage or finished edge. | Edge stability, fraying, curling, woven markings, and the transition from selvage to usable fabric. | Cutting and sewing planning, woven fabric assessment, and checking edge presentation. | Whether the selvage is included in quoted width and how the material behaves after cutting or washing. |
| 5. Drape and Hang | A section of fabric hanging freely against a neutral background, with natural folds visible. | How the fabric falls, fold depth, body, fluidity, and visible stiffness or limpness. | Dresses, shirts, scarves, curtains, and other products where movement or hanging appearance matters. | Drape depends on fabric construction, finishing, and sample handling; assess a physical sample for final selection. |
| 6. Light Transmission | The fabric held in front of a consistent light source, with the light and fabric both clearly shown. | Relative transparency, openness of construction, and visible variation across the shown area. | Sheers, lightweight apparel, linings, curtains, and layered applications. | Opacity can look different under other lighting and colors; confirm with a sample under intended use conditions. |
| 7. Color in Neutral Light | A color view under diffuse, neutral lighting, ideally with a neutral gray or white reference in the frame. | Approximate hue, visible shade variation, print clarity, and color consistency within the photographed piece. | Color selection, print review, and coordinating fabrics with other materials. | Screen settings and lighting affect color; confirm with an approved physical swatch and agreed color standard. |
| 8. Pattern Repeat and Alignment | A sufficiently wide view showing multiple repeats, plus a close view of print or weave detail. | Repeat direction, spacing, registration, alignment, and visible differences between adjacent motifs. | Garments, bedding, curtains, and products requiring pattern matching or repeat planning. | Repeat dimensions, usable pattern area, and cutting allowances; request measurements when layout affects yield. |
| 9. Seam or Fold Behavior | A clean sewn seam or neatly folded section photographed close enough to show the fabric response. | Bulk at the fold, seam appearance, fraying at a cut edge, puckering, and how the material holds a crease. | Assessing suitability for sewing, hems, structured items, and products with visible seams. | Performance varies with thread, stitch, machine settings, and finishing; conduct a sewing trial for production decisions. |
| 10. Finished-Use Context | The textile shown in a representative finished product or application, with a separate close-up of the material. | Scale, appearance in context, surface interaction with light, and how the textile contributes to the finished look. | Evaluating intended applications such as apparel, soft furnishings, accessories, or craft products. | Context images may involve styling or processing; confirm the exact fabric, finish, and construction being offered. |
How to Select and Share Textile Photos Across Markets
For global buyers, textile photos should answer practical questions before a sample is requested: What is the weave? How does the fabric fall? Can its color be trusted? Baymard Institute’s product-page research found that 56% of users’ first action was to explore product images. Salsify’s 2024 Consumer Research likewise reported that 87% of consumers consider product content important when deciding what to buy. Clear visuals matter. Photograph the full textile, then add close-ups of its weave, selvedge, and finish. Include a hand or ruler for scale, and show drape in natural movement rather than only on a flat table.
Across markets, share consistent image sets but adapt the details around them. Use neutral lighting, include a color reference in internal quality checks, and avoid filters that make a fiber look softer or brighter than it is. Screens still vary. Add captions with fiber composition, weight, width, and care information, using metric measurements and plain language. Translate captions for buyers, not just search engines; unfamiliar terms can blur useful distinctions. Keep filenames descriptive and provide accessible alt text. A small issue: the same color name may suggest different shades to different buyers, so pair names with a physical swatch or standardized color reference when precision matters. When sending files, retain high-resolution originals and provide lighter versions for quick viewing. Don’t assume one crop works everywhere. A square thumbnail can hide a fabric’s width or drape.
Related Posts
-
How to Choose the Right Textile Printing Method?
-

10 Essential Tips for Effective Textile Finishing Techniques?
-
2026 Best Textile Finishing Techniques for Global Buyers?
-

What is Textile Turkey and its Impact on the Global Market?
-

Top 10 Processing Textile Techniques for Global Buyers?
-
Essential Tips for Choosing Textile Printing Chemicals?